
Garden from Scratch
If you are feeling the weight of the world and want to start a garden, here are a few tips I’ve learned over the years of gardening in Colorado. At a glance, here are my steps when starting from scratch.
Test Soil
Select Area & Break Ground
Prep Soil
Set-Up Irrigation
Lay Weed Fabric, or Not
Plant
Build Supports (Trellis or corral)
Pinch, or Not
Fertilize
Harvest & Post Care
Each one of these steps deserves its own blog post but time is of the essence so in this post I’m going to cover the basics to get you started. If you enjoy where this post is going, let me know in the comments and I’ll follow up with more details.
Test Soil
I’ve used CSU Extension or Logan Labs to test our soil. While testing soil is optional, and not always timely, it is extremely helpful in having a successful garden. I confess, however, that I didn’t test my soil the first year either so don’t let this step discourage you. If you have time, you can ask the customer service desk at local nurseries (like Eckters) for a CSU Soil Test Kit. They will give it to you for free. You then take multiple samples of your soil (6”-12” deep) and mix it up. Put 1 cup of the soil in the CSU container, fill out the paperwork that came in the container, then send it via the post office. If you are nervous to go to the post office, print a label online (try Pirate Ship) and schedule pick it up with the post office. Second option is to take a similar sample and put it in a ziplock bag and send it to Logan Labs. Print off their intake form online and send it with the sample. Both labs charge around $35 per sample. Logan Labs is very timely, more thorough, and you can have results in a week. While CSU is local and gives local recommendations, but they are slower.

Select Location & Break Ground
If you are looking at our yard and wondering how you can turn it into a garden. First, consider these two things:
Can you get water there?
Does it receive at least 6-8 hours of full sunlight per day?
If the answer is yes to both questions, then it might be a great place for a garden. I’ve turned entire yards into a flower fields, an entire open space into community gardens, and a rocky playground into a permaculture school garden—so keep dreaming and taking actions to make your garden a reality.
Once you have the location mapped out, first step is to decide what type of garden structure you want. Here are three that I’ve used:
In Ground - This is planting directly into the ground. You must first plow the ground and till the soil to break it up large clumps. Here in Colorado, its large clumps of clay. We always use a John Deere tractor to break new ground but you could also use a strong tiller. Before we had a tractor, we asked around to other people to find someone who would come out and break ground. Our BCS Tractor with a rotary plow and tiller does the job its just more difficult. I prefer growing directly in the ground because I think the plants stay cooler and more moist, but its not always the easiest route if you can’t get down onto the ground.
Raise Bed - This is a great option if you don’t want to get down on the ground. Using 4’ wide increments is always helpful at keeping gardens manageable so you can get to area from both sides. My first garden was made from 4x8 cedar posts stacked 2’ tall in my tiny backyard, and at the community garden we use 2"x 8"x15’ cedar post to simple edge a 15x15’ square garden that we added soil to. Just keep it simple by using a square/rectangle shape because its makes irrigating and harvesting a lot easier.
Sheet Mulch - If you have really bad soil, you can build a garden using the sheet mulching method. This idea came from the permaculture movement and basically builds soil ontop of the ground. You layer ingredients in this order—1” manure, 1 layer of cardboard, 2” manure, 4” straw, 2” manure, 4” straw, 2”manure until its 12” high. Make sure the manure is composted and ready to use. It makes a huge fluffy bed, and people will surely question what you are doing, but after it compost in place you will have amazing soil. If you are interested in this method, I’d recommended searching online for more in depth directions. Gia’s Garden is a great book on the topic.
Prepare the Soil
After you’ve broken ground, or built your bed, make sure to use compost AND fertilizer. I used to think that 2” of compost was all my garden needed. I was wrong! If you want your garden to thrive, make sure you sprinkle in an organic fertilizer along with the compost. While compost is like fiber for the soil, fertilizer is like vitamins and your soil needs both. First, spread 2” of compost on your garden, sprinkle with fertilizer, then till it all in at once. Rake smooth and your seed bed is almost ready to plant.
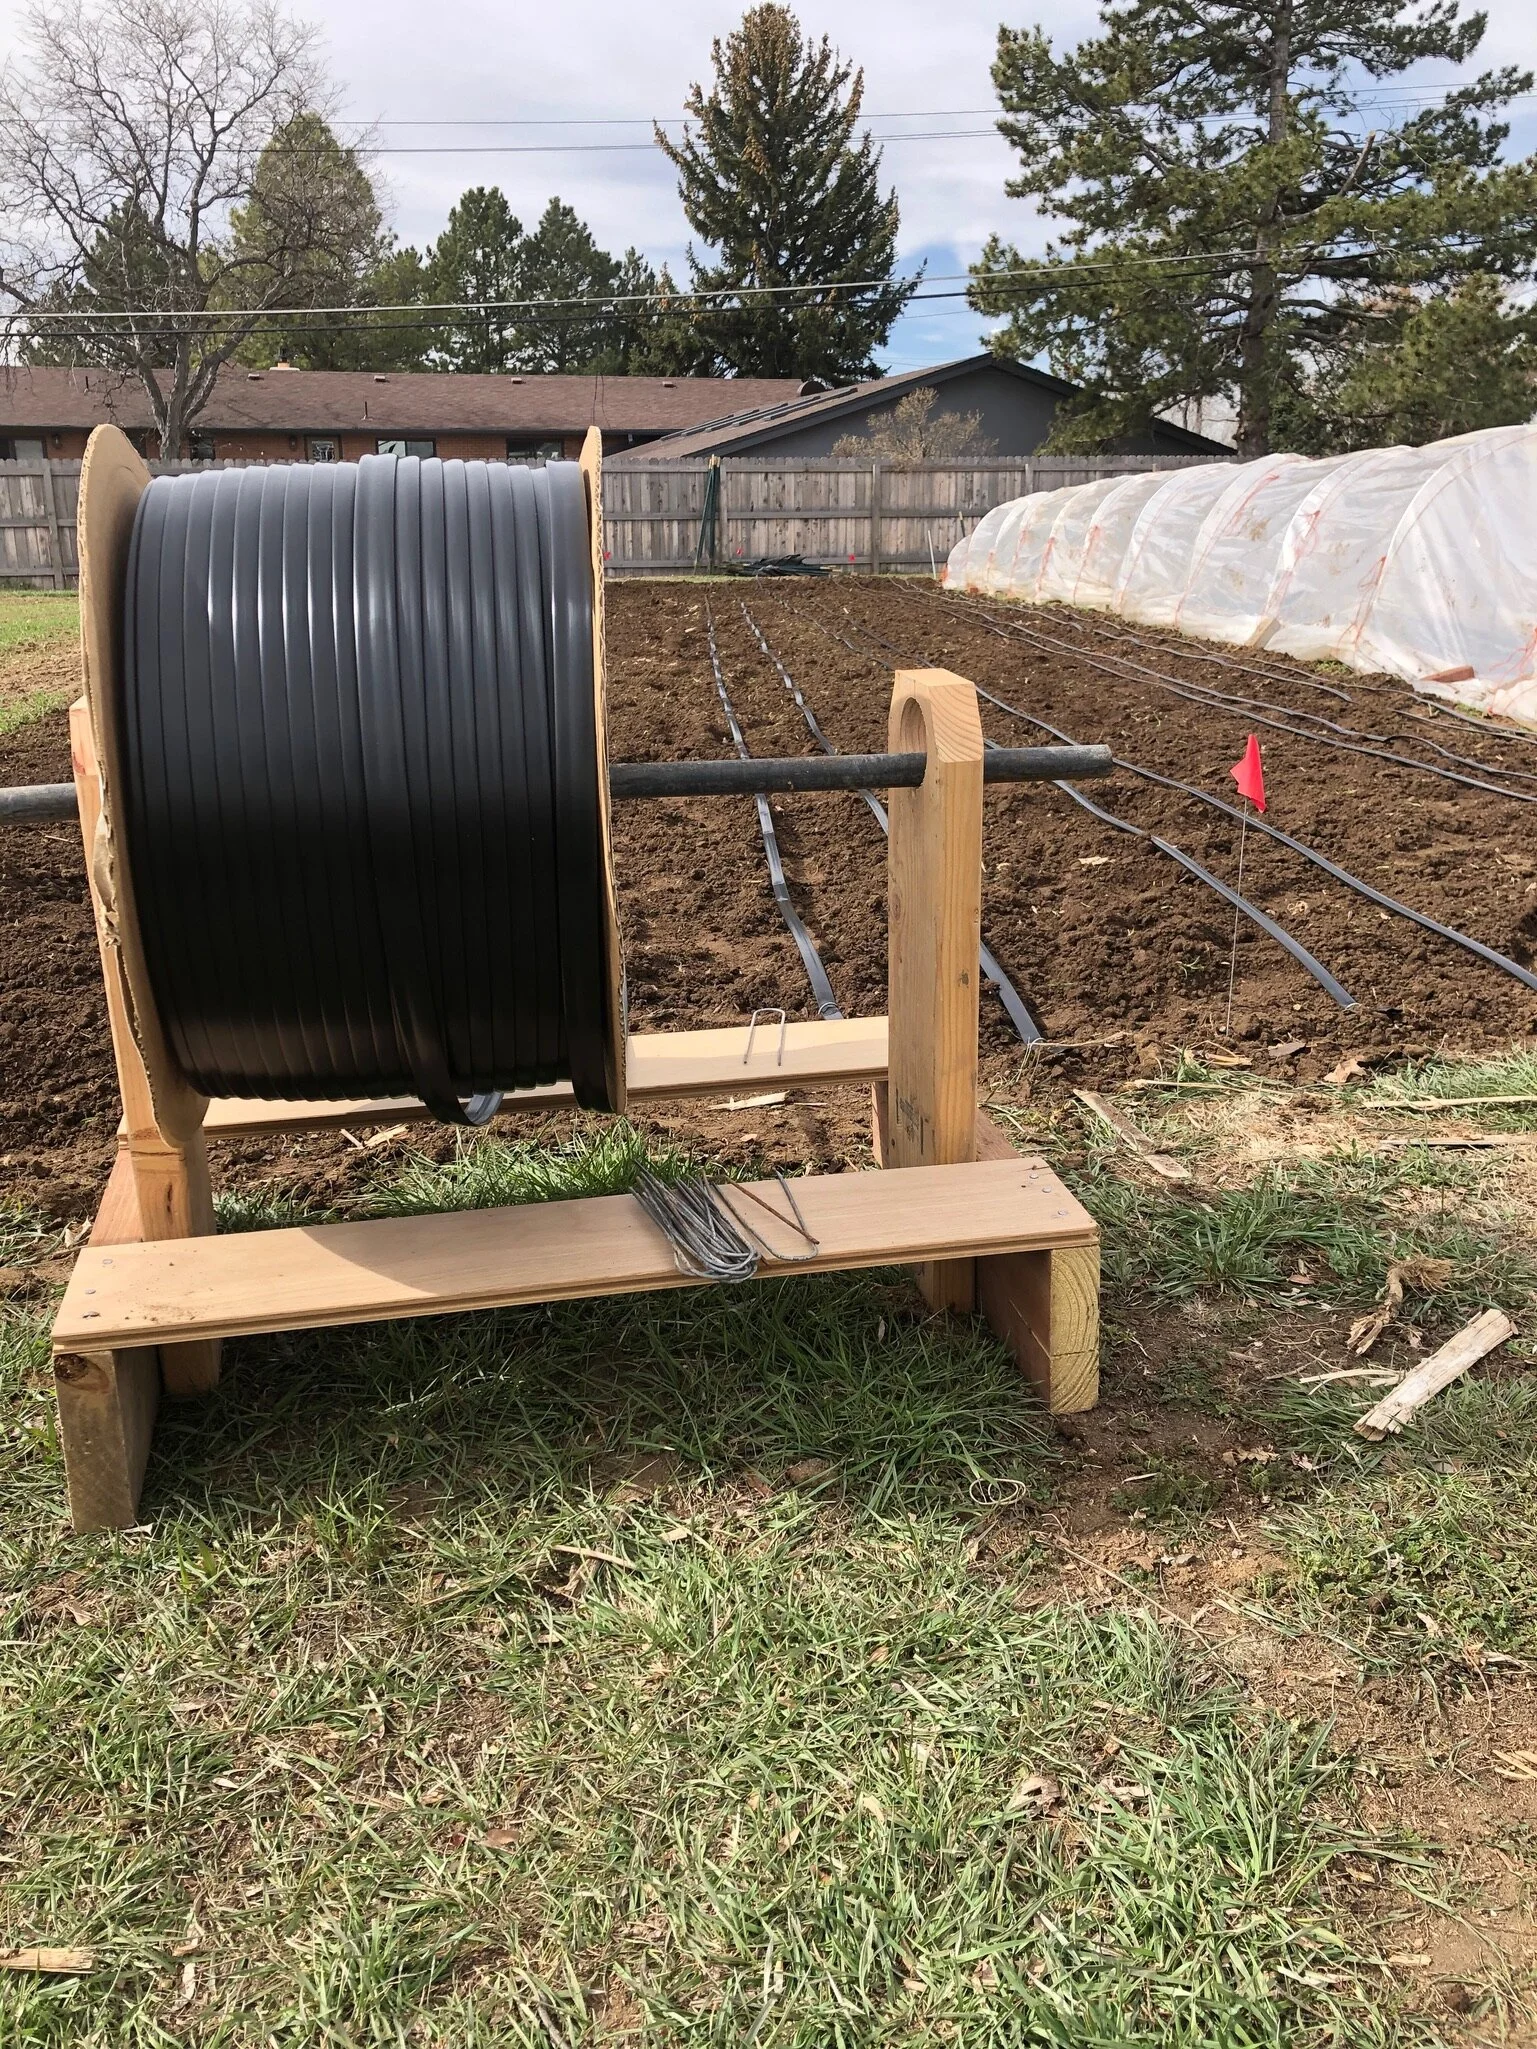
Irrigation
Next, set up irrigation. I like to use drip tape from DripWorks and I place it on a timer that is hooked to a hose. I’ve found the plants grow better and I enjoy gardening more when everything is automatically watered. For early spring plantings, you can sow is March or April and hope it will rain, or use a garden hose until you can get a system set up and running and your water turned on for the season. But ideally, set up an irrigation system before planting.
Weed Fabric or No Fabric
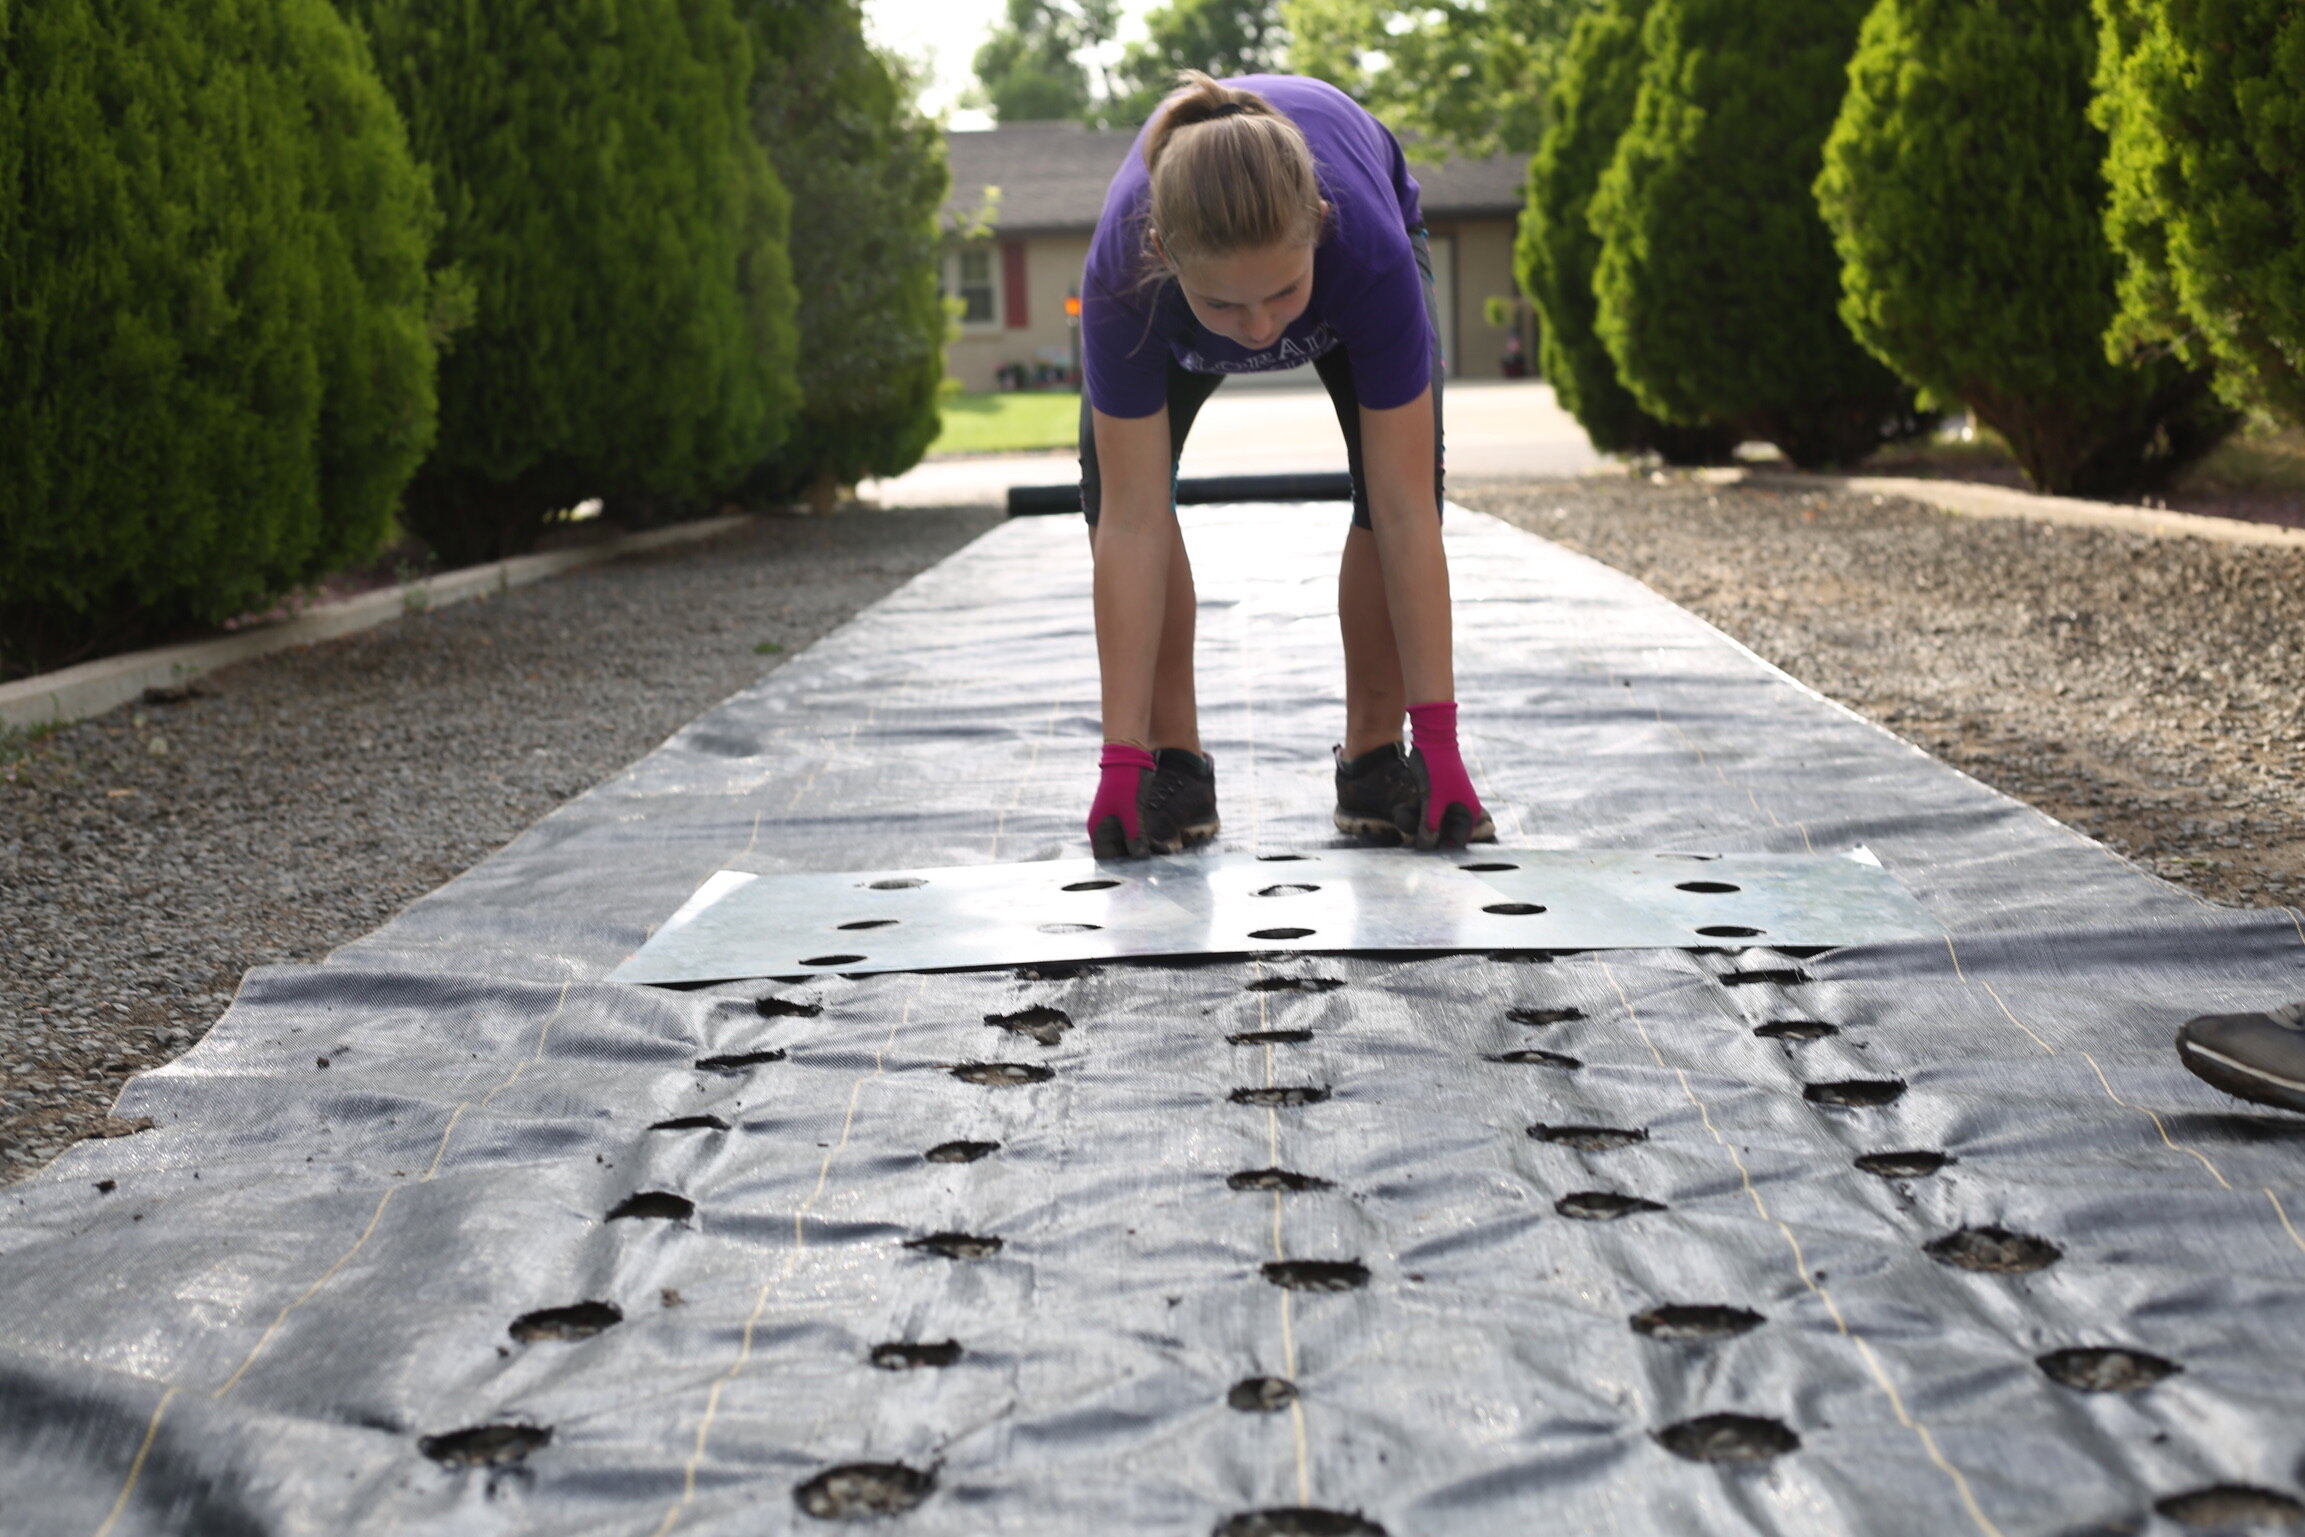
If you want to use fabric, then I’d lay the fabric right over your irrigation drip lines so more of the soil can be watered. Many people with home gardens don’t use fabric but once your garden gets large, its worth the investment. For our weed fabric, we burn holes in the fabric before we lay it down, then we plant directly in the holes. We like to use Sunbelt weed fabric which you can buy locally at ACW Supply or online from Amazon. If you don’t use fabric, cover your soil with straw to retain moisture in the soil.
Plant
April and May are perfect times to plant for the home gardener. In April, you can plant cool season crops like lettuce, snap peas, onion, etc. And in May, after the last frost, you can plant tomatoes, peppers, herbs, flowers, etc. Order seeds online or visit a garden store (they are still open). Grocery stores also sell seeds that can be directly sown. After you plant, be sure you keep the seeds consistently wet. As they grow, you can spread out your watering cycle to 3 times/week but in the beginning treat them like newborns.
Trellis or corral
Once plants start growing, have a plan to support their growth. Tomato cages help fruit stay off the ground, just as corralling helps dahlia blooms stay upright. Consider building a trellis, using t-post and netting, or t-post and baling twine to support plants that grow tall.
Pinch or Not to pinch
Several plants like pinching and others don’t. Read the seed packet or look online to understand if your plants would benefit from pinching which encourages side growth. Dahlias love this and produce twice as many flowers when pinched.

Fertilize
Fertilizing throughout the season is also a game changer. If you can find compost tea, or make it yourself, your plants will produce abundantly for you. We make 25 gallon batches of compost tea every week in May, June, and July. We purchased our compost tea maker from Growing Solutions, who also has small units as well. If you can’t find compost tea at a local nursery and can’t make it yourself, then consider topdressing with regular compost around the base of your plants. Just sprinkle a handful around the stems and rake it in. Since I started fertilizing with compost tea (worm castings and compost) on a regular basis, my gardens have exploded!
Harvest & Post Care
Harvesting encourages the plant to keep producing so make sure you harvest flowers or vegetables when they are ready. The more you harvest the more they will give. After you harvest, take your flowers or produce into a cool area. Either into your garage, directly into your house to wash and store, but whatever you do, do not leave them outside in the sun. The best time to harvest is early in the morning when most of the moisture is in the leaves, fruit, or petals.
Every year, continue to add compost and fertilizer in the spring, and test your soil every other year or every year if you can. Ideally, you want 5% or more of organic matter, and a balanced ratio of magnesium and calcium. Gardens take commitment but there is nothing more rewarding than to start a garden from scratch and take it all the way to the seasons end. There is magic in the smell of soil and love in the fruits that are harvested. I can’t imagine life without a garden. I am excited for you and please let me know if you have questions. I’d love to hear from you.
Here’s to modern Victory Gardens everywhere!
Gina